W7"Big machine , (CORONA_V)
This document is under Construction
-Group assignment:
Group assignment:Group assignmentThis week was delayed untill the lab opens, that took to long.... and for that I will upload the design and the sitting for the machine, and whait for the lab to open...
first, lets talk about our CNC machine in the lab : SHOPBOT with a full board size of (96 inchs x 48 inchs x 6 inchs)
our machne can read G-files that is saved from its software(Vcarve), check the linkHERE
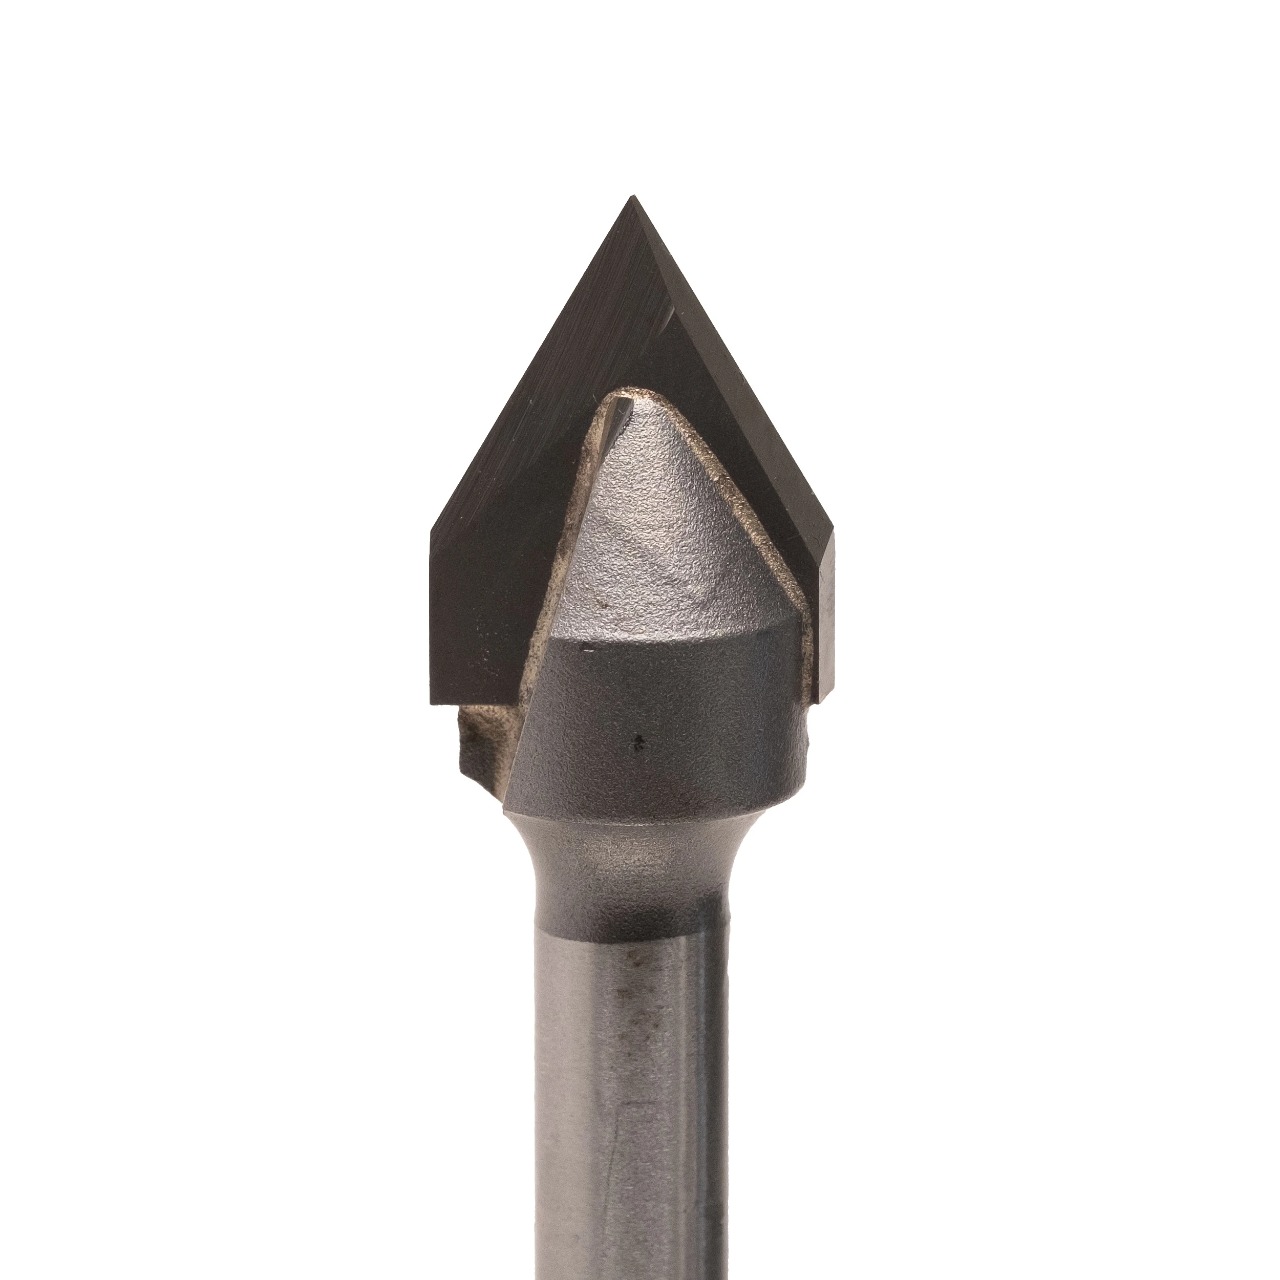
I am going to use plywood for my design , MDF or wood if founded in the lab, and for that, I need to choose the right bit for cutting; first I through of using and for that I will use v shape bit, so the outcome shape will have a slop:
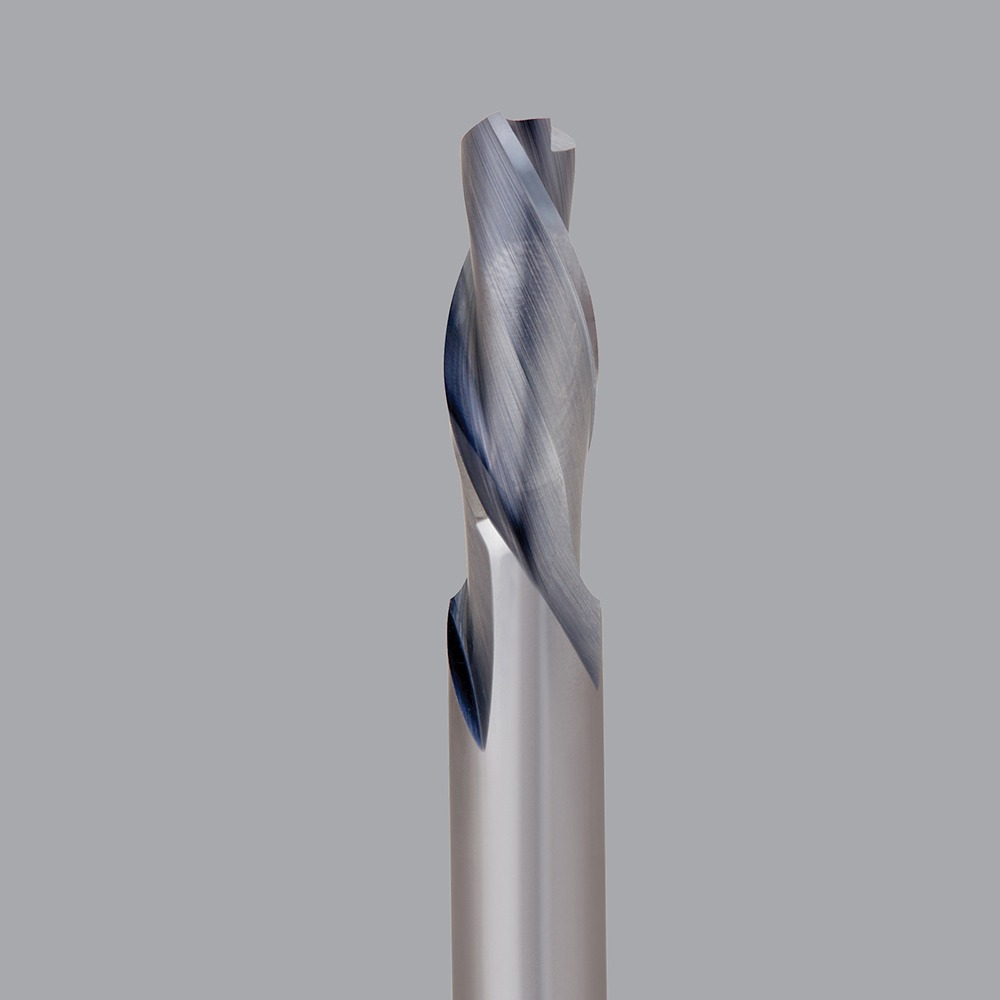
but then, I have changed my mind after some advices and went with 1/4" Down-cut(57-910):
just to know that this machine can work on may types of materials other that wood, it can also work on plastic foam and aluminum....I wanted to try something else, but I don't want to kill somewone by mistake
Also, the machine can Cut, crave and mill all you wanted, with different speeds, but make sure to go step by step with the speed adn don't cut the material with high speeds or the bit may fly at you....(game over)
feed rate and cut depth with the speed , all need to be pefect for you project and used materials
if you find the machine doing any funny thing, go to STOP(red big button) and stop it....
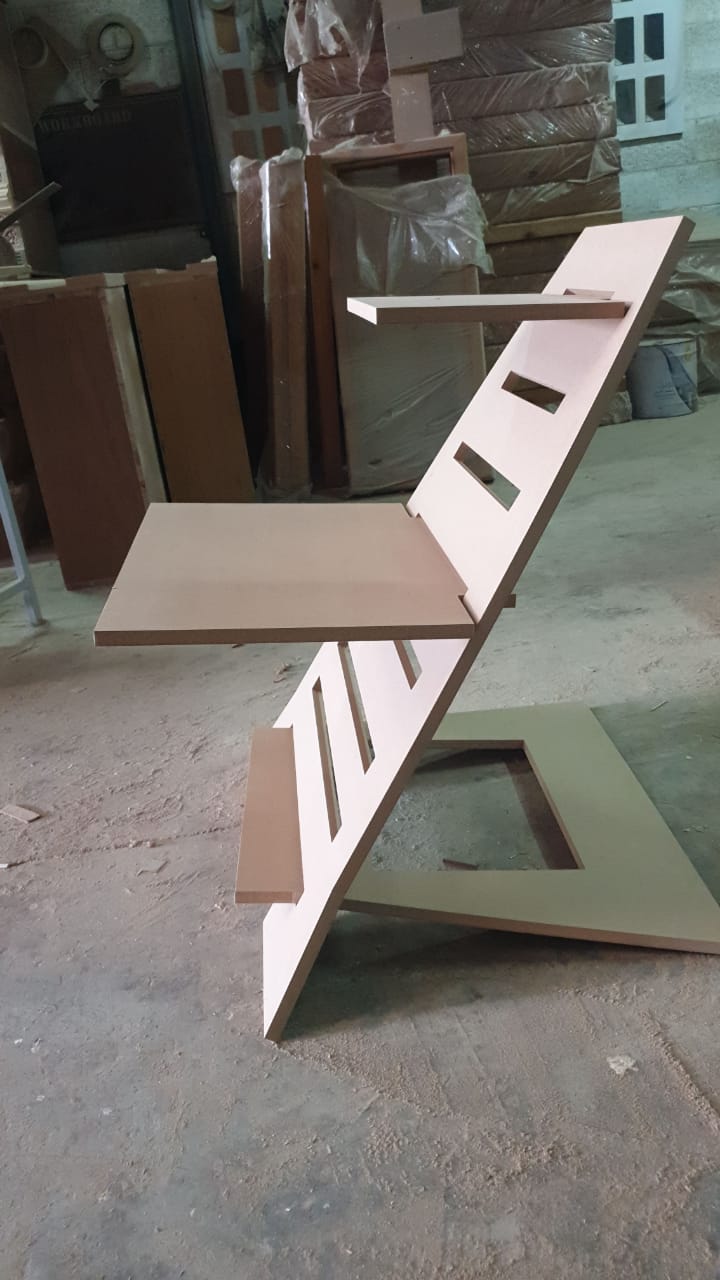
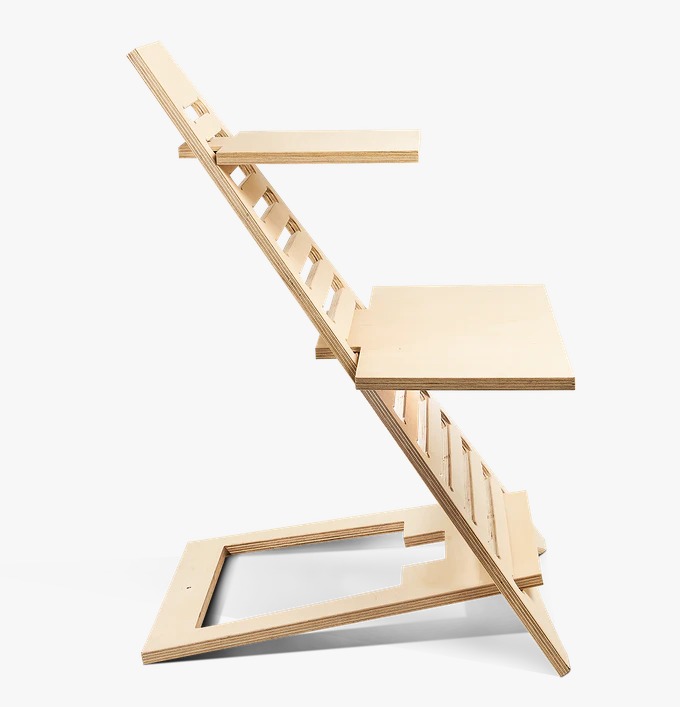
and for the design , I am using onshpe to make a level table, this table will have mnay levels and the user can choose the hight he wont for it shelves:
something like this:
let's take a look at the video of the design that I have worked on :
take a look at the draw pic from onshape and step file in the following :
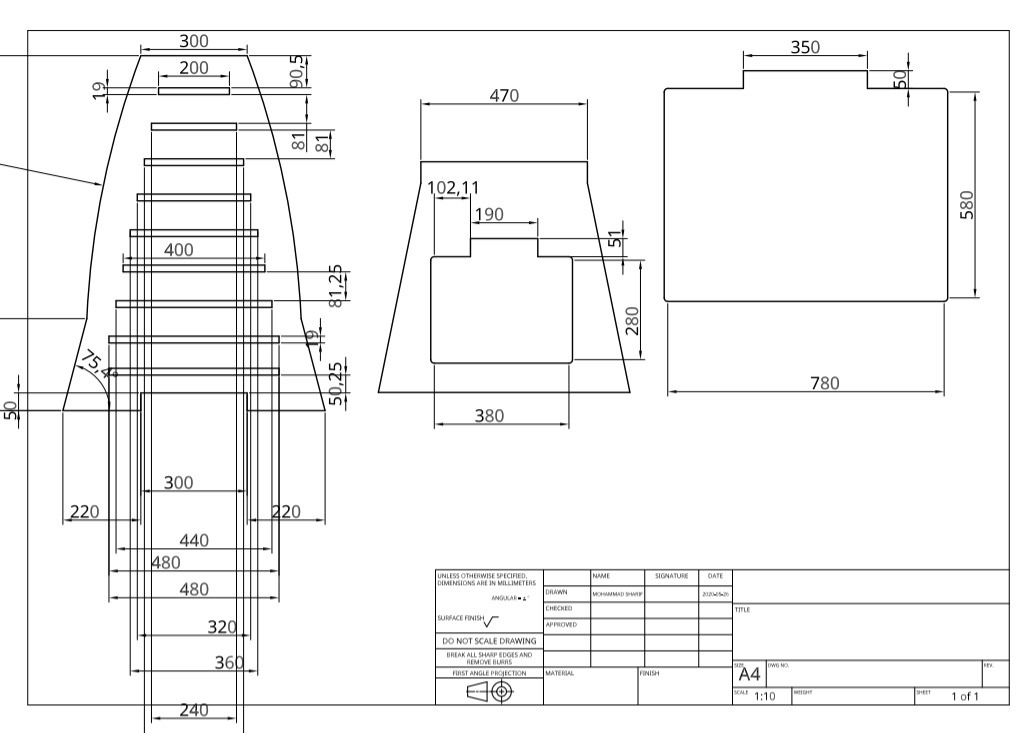
step file STEP
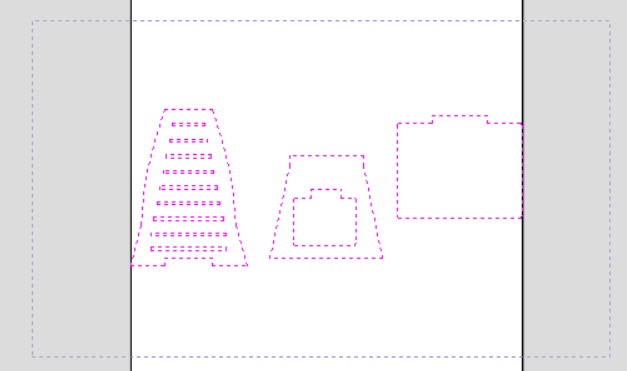
so the table has 4 parts, but you can only see 3 parts , because one of the shelves(base shelf) has a cut inside it to make to make the top shelf...
now, let's go to Vcarve program to compile the design for the machine:
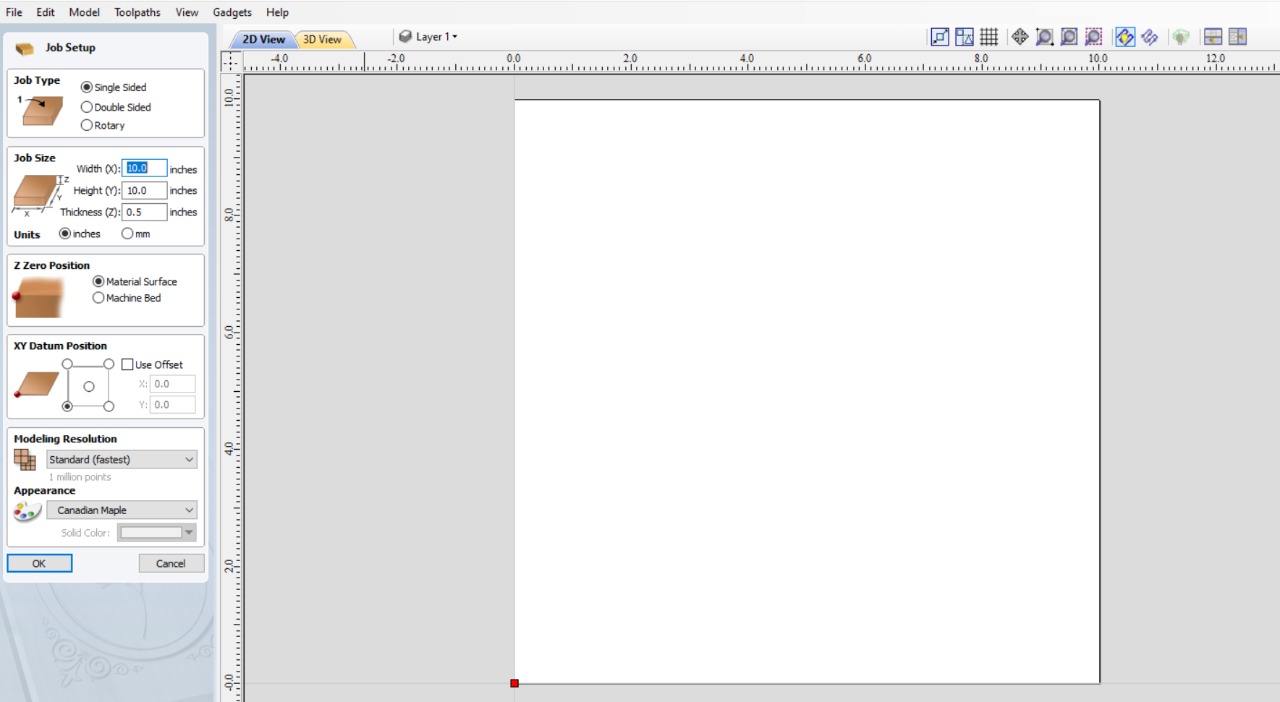
as you can see, there is to tools to the right and the left of the program:
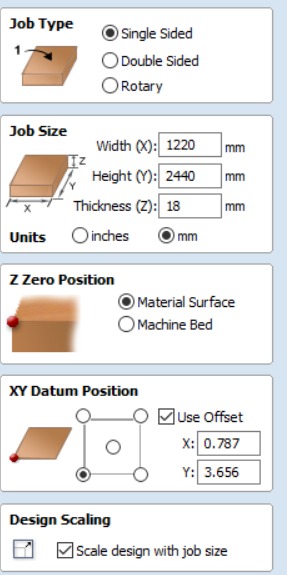
the tools to the left side will let you pick the number of layers you are wotking on, the from job size you can add the size of the working area for X,Y and Z for the thickness of the material.
from Z zero position, you can pick the z starting point, for me it is on the top... and then lastlly , XY datume position will determine the starting position for X and Y
theb press ON below...after that, a new tool window will open :
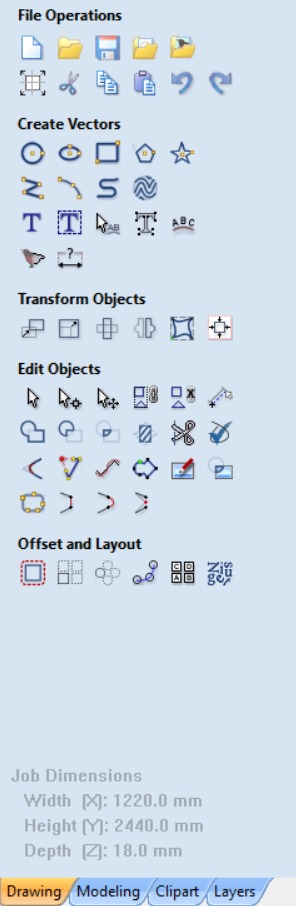
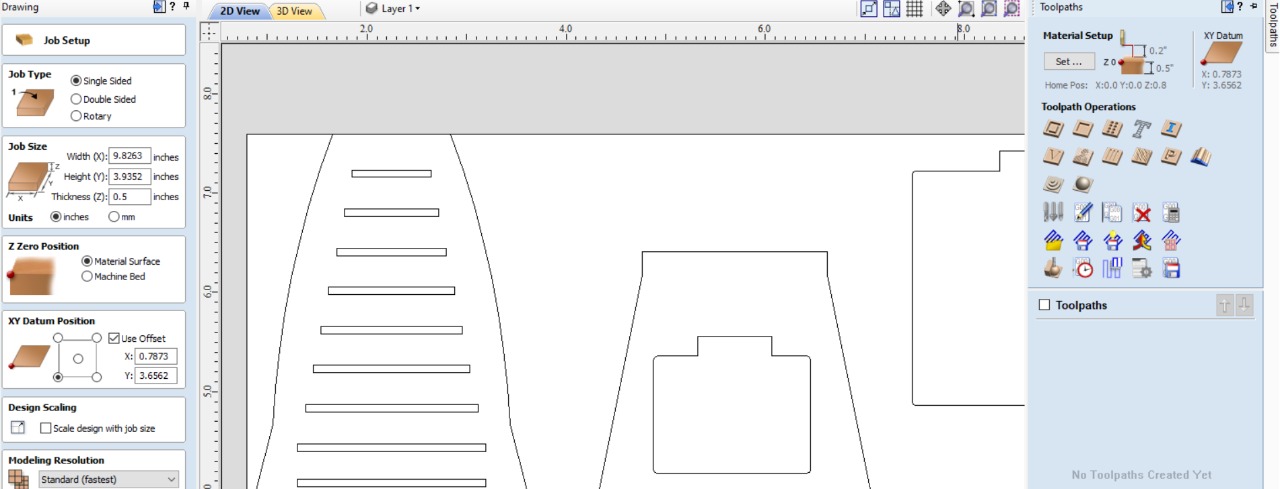
now let's go to the right tool bar:
after sellecting all working parts, I determined the cut depth 18.5 mm to ensure the cut to be more than 18mm of the sheet thickness,after that, I set the number of passes to 3 so that the machine will go 3 times over the wood to cut it, each time with ~6.16mm depth.
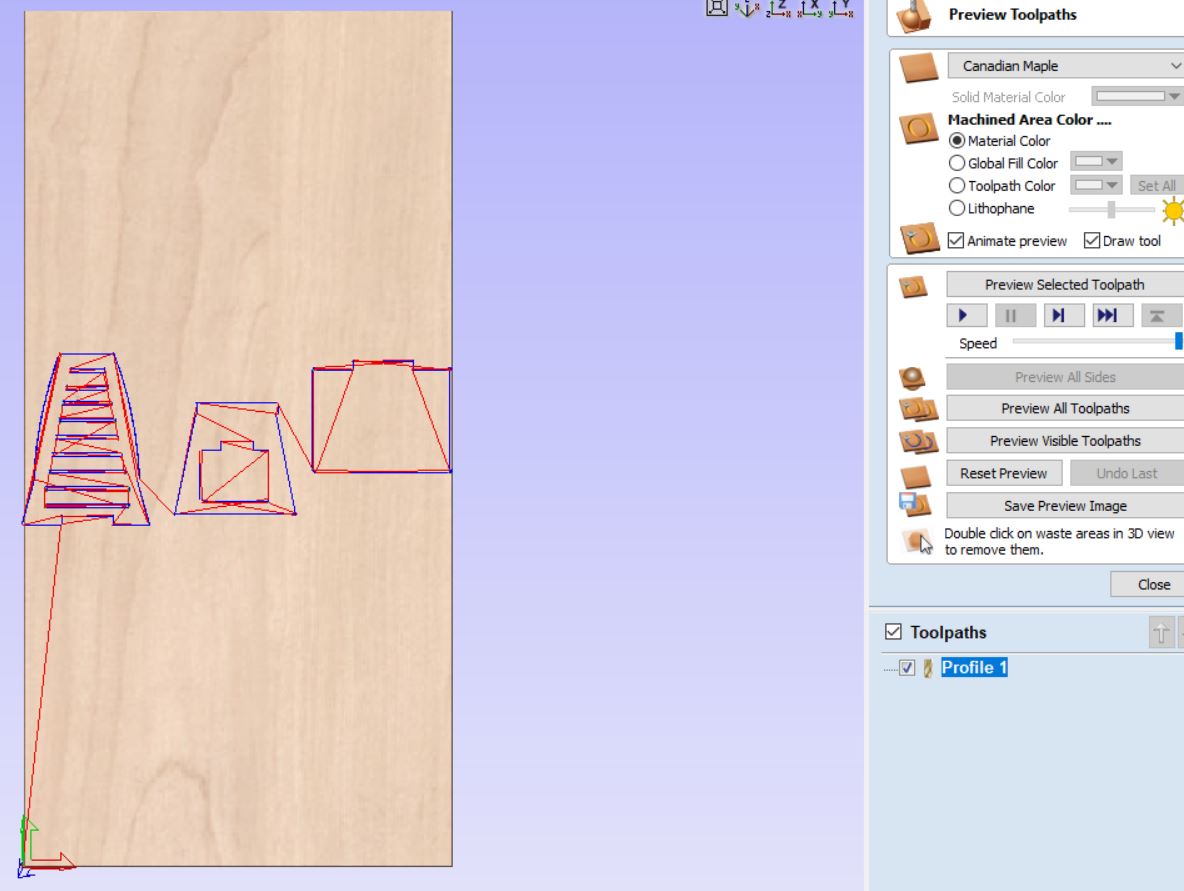
I selected outside to cut the same outer dimensions, so I will not lose any fo the size of the work to the bit when cutting:
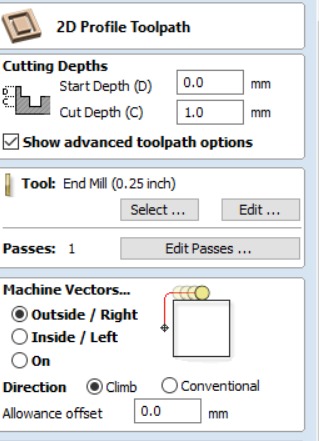
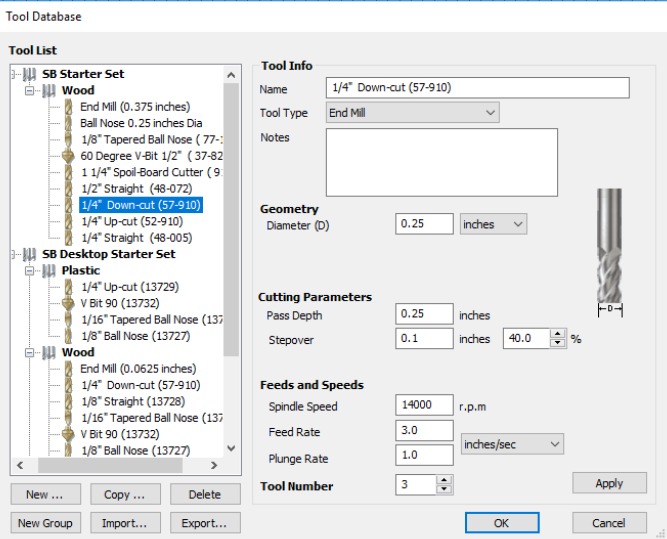
and like descibed befor, the bit that I will use is 1/4" Down-cut(57-910) :
aftr that, press calculate.... make sure to select all needed parts
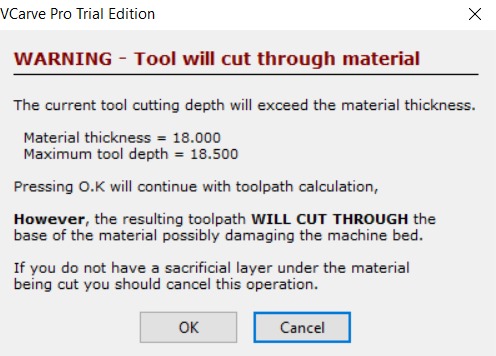
ofcource I will reacive this alert..... I ma cutting depear that 18mm of the part, but this machine hass an auto calepration for Z using meatalic plate attached to the matherboard, and we also adding to the base another sheet of wood with for extar thickness and to not touch the maealic base of the machine
then lets save the design,check it here: Vcarve
nest is cutting the design........................when the lab opens
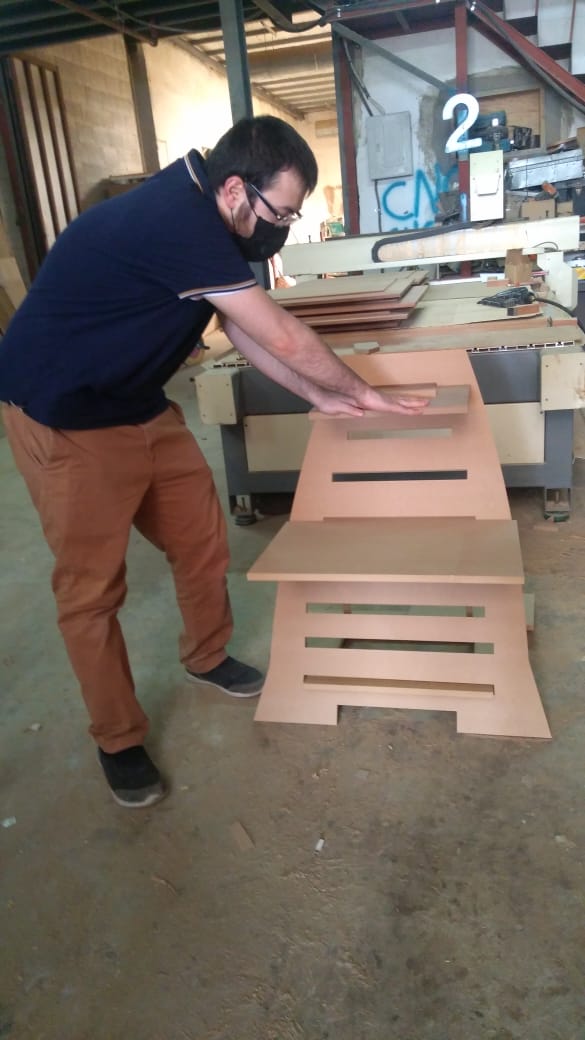
UPDATE ON THE DESIGN..... just so you know this info, the table must have some angle to it so that wen you put the laptop or the keyboaur,it will not fall down.

so you need to make the spaces wher you put the shelf to a 2.8cm , that will give it more space to have the needed angle:

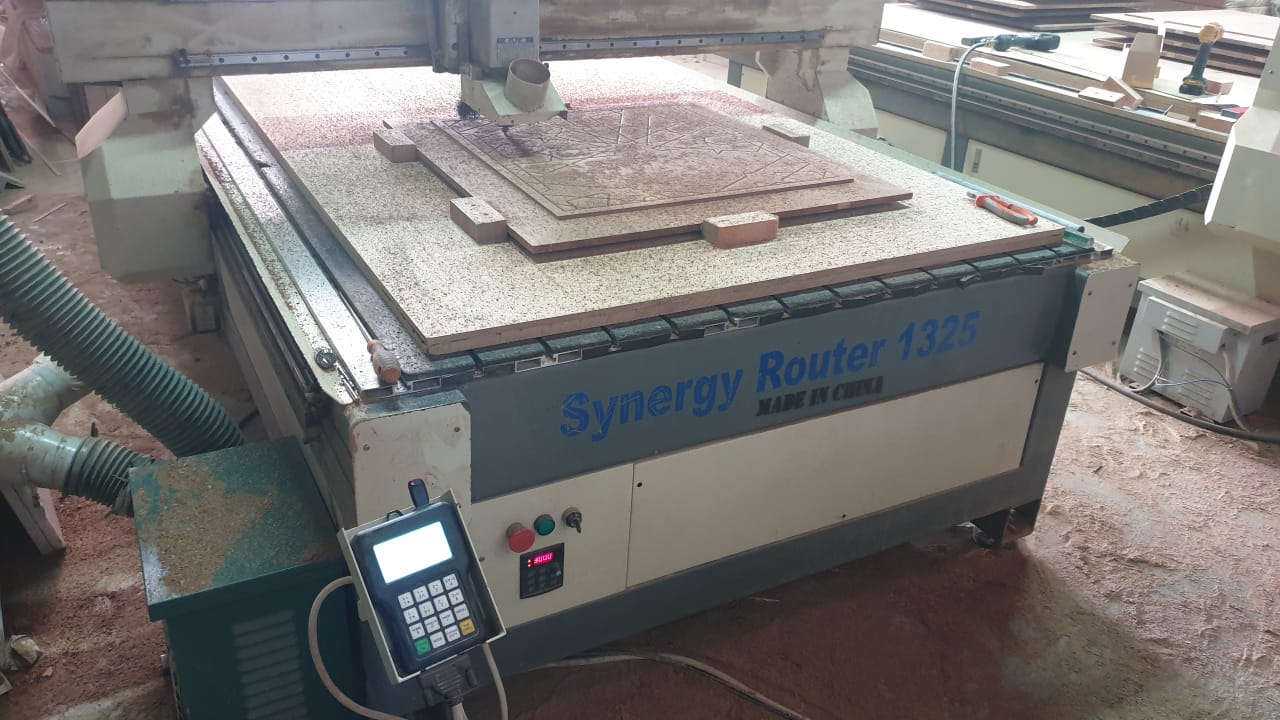
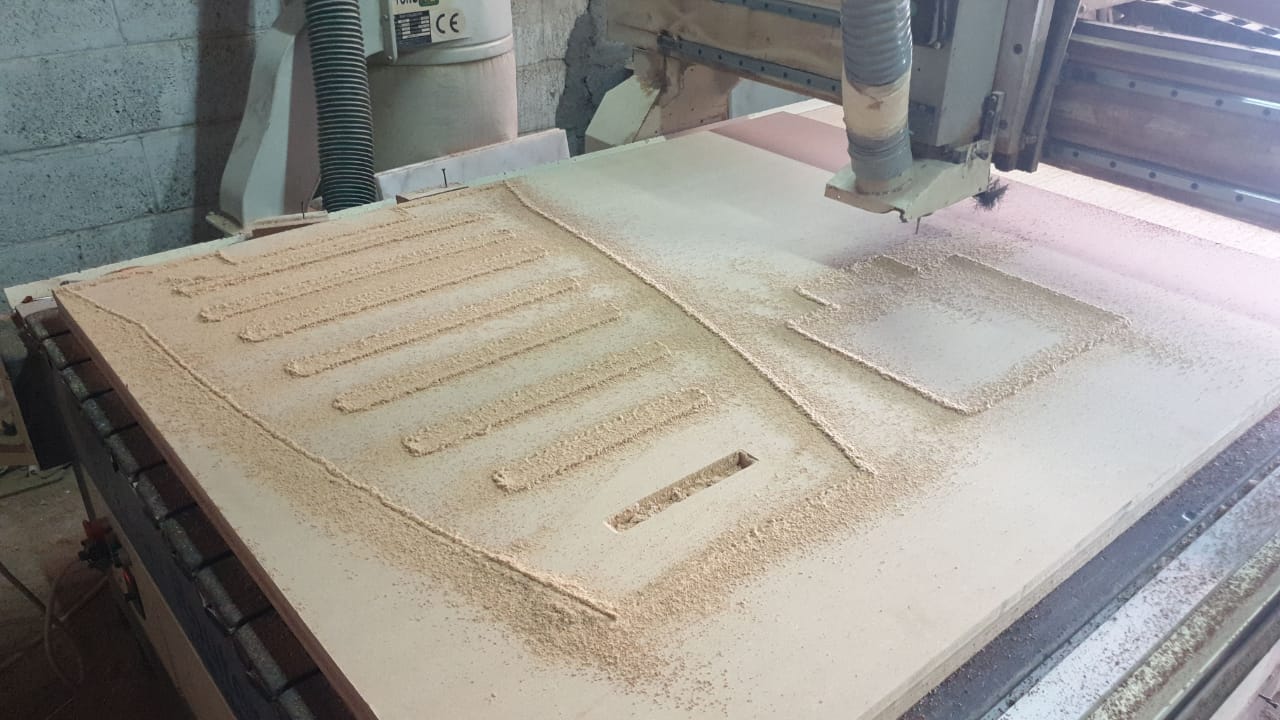
luck for us, the lab is closed,..... I took all the masks we have in home and rented a cnc machine in a small workshop for 100SR for one hour, they are using a chines cnc called "Senrgy router 1325"
the machine has the old traditional controller that use an usb to send the design to it, and yhe vontroll of the spendel speed is done from a small baord located on the machine:
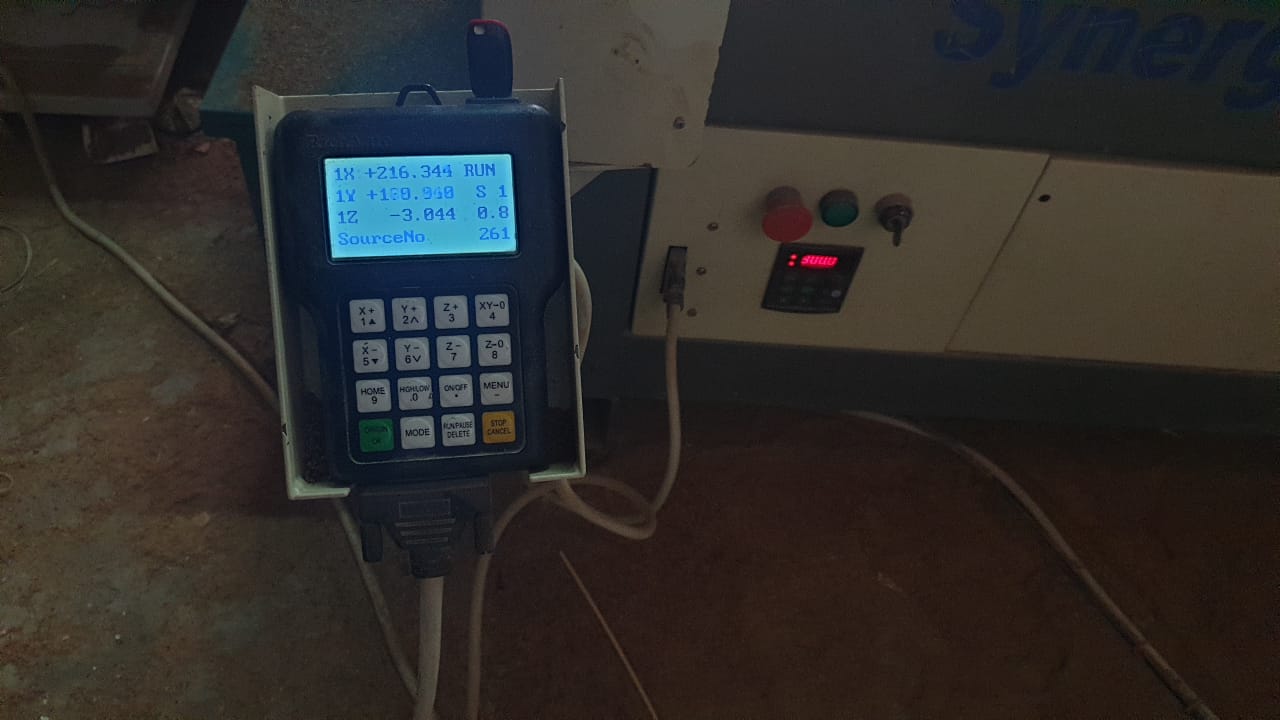
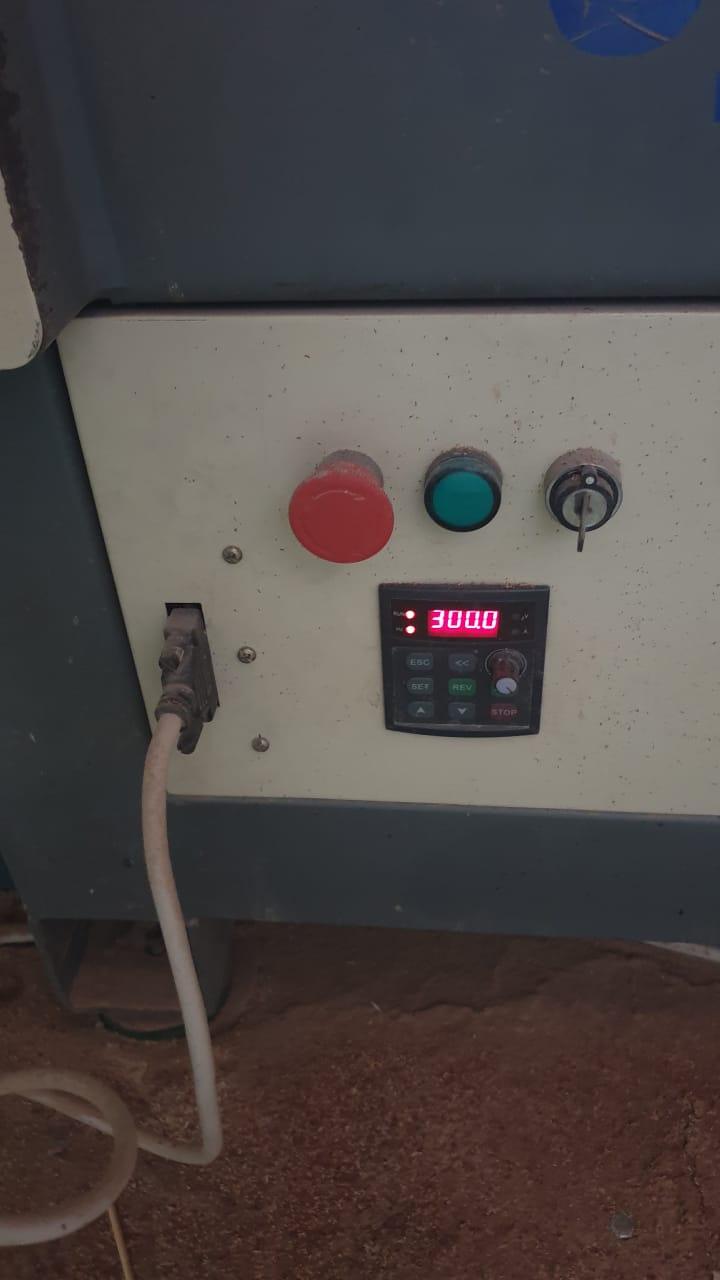
the spendel speen can reach 300rps
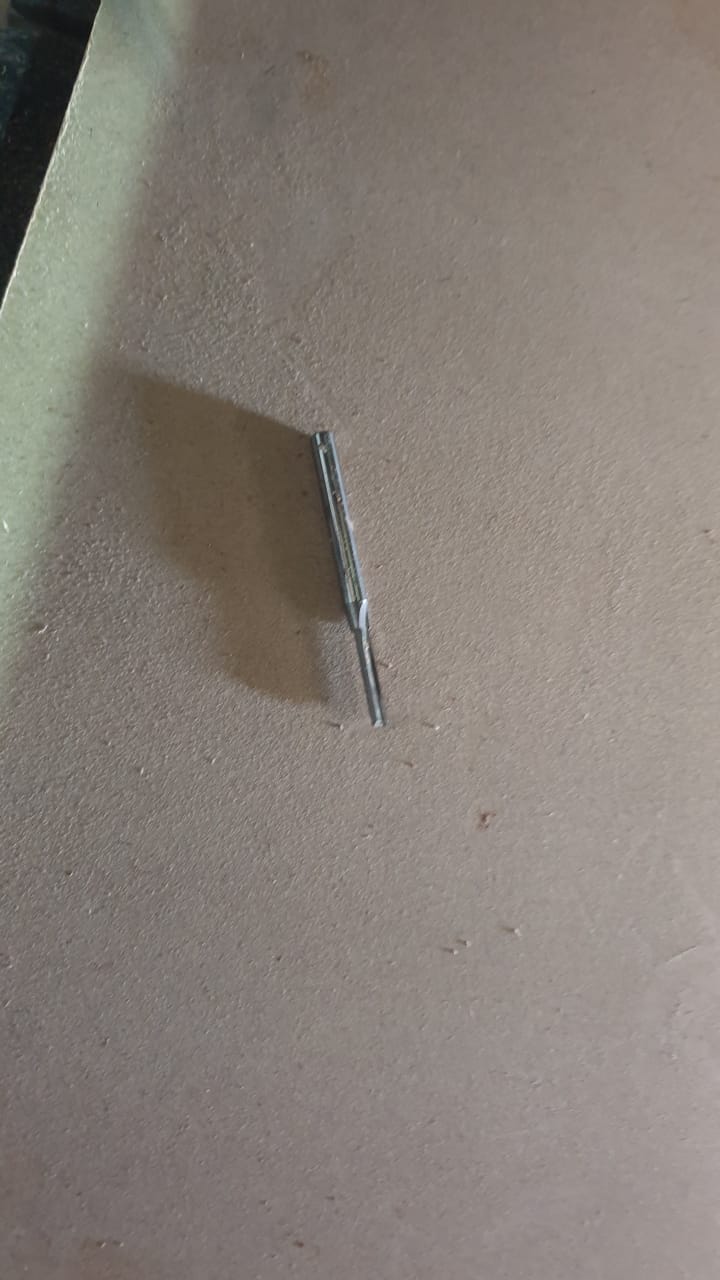
let's insert the bit to the machine, we are using a 4mm bit :
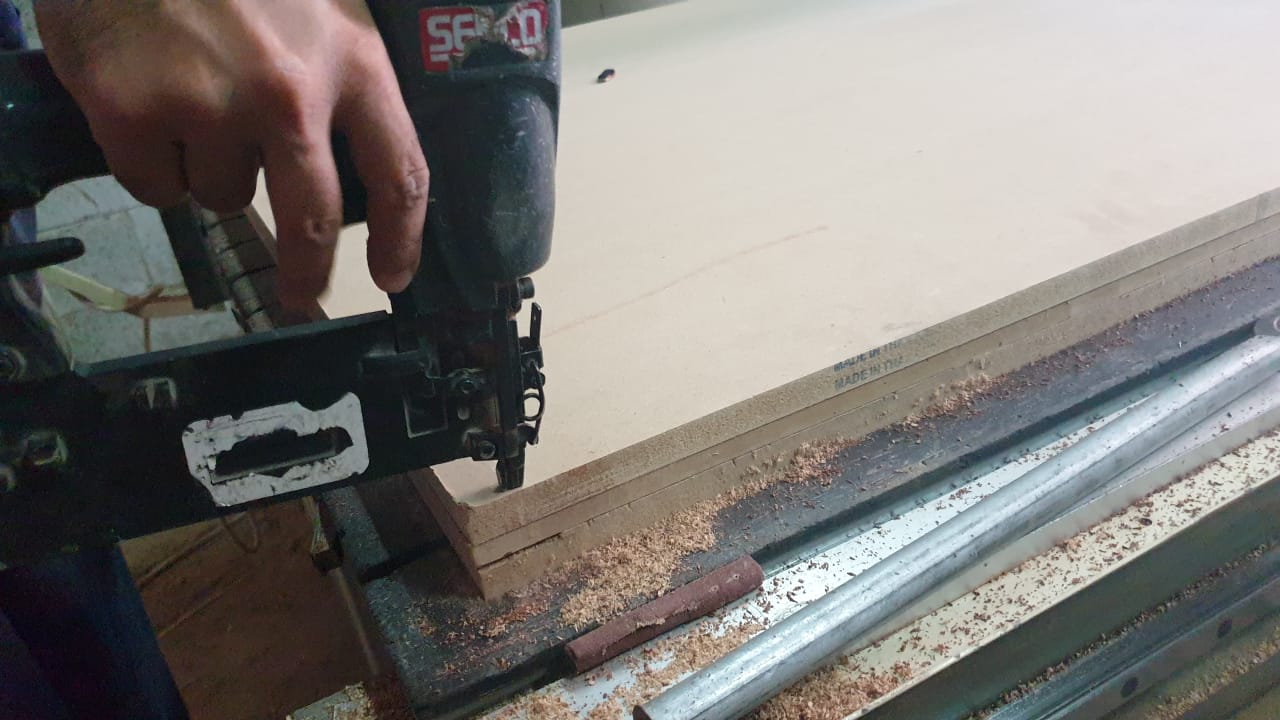
let's make sure that the mdf board is secured in place, by adding some nails
let's take a look at the steps for setting up the dsng on the new machine, wew are using artcam , it is simelar to Vcarve sitting and steps :
now let's save the ddsign on USB and send it to the machine, and see it running:
here is how you can pcik the desing from the controller:
as you can see, the machine will go 2 time over the board to cut the it:
and here is the table, you can cahnge the level depends of the use, for me I will palce the laptop on the highes level, and maybe a keyoard and mosue on the lower level, this table can be used for house workers to make there working more healthy by standing while working: